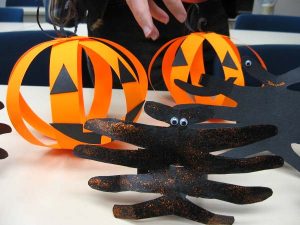
 Halloween is that time of the year when kids can dress up in their spookiest outfits. This is when I think about how to prepare my house for the visiting little goblins and witches.
Of course, budget is never far from anyone’s mind these days. This year, I decided to go the route of homemade Halloween decorations. I decided to make it fun by taking on little “projects” that my son could help me out with.
Outside Spookiness
1. The classic jack-o’-lantern
Take some Terra-cotta pots (make sure they are clean and dry), and invert them. Cut out the eyes, nose, and mouth from some yellow-orange craft paper. Get some all-in-one glue and spread it over the surface of your pot, stick on your jack-o’-lantern’s face, and seal it with another coat of glue. Place an old tree branch in the center for the stem of the pumpkin. Line the pots on the sides your porch steps or on a flower pot ledge. This is an easy, kid-friendly, and cheap way to decorate the entrance of your home for Halloween.
2. Wolf path
Take some sponges and download some templates of wolves paws that fit the size of your sponges. Use the templates to cut and create your own paw-sponge. Get some washable glow-in-the-dark paint, dip them in, and place on the ground- maybe in your garden, or leading to the entrance of your house. Your kids will love doing this! You’ve got a neat, washable, cheap and enticing trick to get the kiddies excited over the treats you have inside.
Inside your Haunted House
1. Window treatment
Choose two window panels facing the front of the house (or any part where the trick-or-treaters are likely to pass). Get some black cardboard and cut them out to fit exactly the shape and space of your windows. Take note- mom’s and dad’s should do this part. Then measure out pumpkins eyes, nose, and mouth and again cut them out. Make sure these holes can be seen from the outside. Take orange tissue paper or bright orange cellophane and paste them to the holes. From the outside, it will look like you have spooky windows. My son loves this neat trick!
2. Kids corner:
This is one the kids will love to help you out with. Collect an old hanger, some glue, yarn, neon paint or markers, and fiberfill and you’re set to go! Download templates of bats and half moons and have your kids color them using neon markers or non-toxic, glow-in-the-dark paint. When they’re done, cut them out, align the front and the back and glue together making sure to insert yarn in the top center part of the bat. Take your yarn and tie them to the flat end of the hanger in varying lengths (think of those pretty hanging lights you may have in one of your corners). Hot-glue the fiberfill to cover the entire hanger and then glue the half moon cut-outs in them. Hang in your child’s room- let them pick out the corner!
Some Tips to Decorate Your Treat Table
Use some orange and black cloth to cover your table. You can purchase a bit from your local store, just enough to be a runner. Fill old jars (remove labels and wash) with orange cellophane and candy for treats. You can use jars of varying sizes, although wider ones would be advisable if you have them. Or you can use old tin cans, cover them with black craft paper, stick cut-out pumpkins eyes, nose, and mouth onto one side, and then fill with treats.
There are so many homemade Halloween decorations you can use to make your home Halloween-ready without too much fuss, money, and time required. What’s most important is making it fun for your kids and their friends!
So, Happy Halloween! Trick or treat everyone!
How do you decorate your home for Halloween?
Leave a Reply