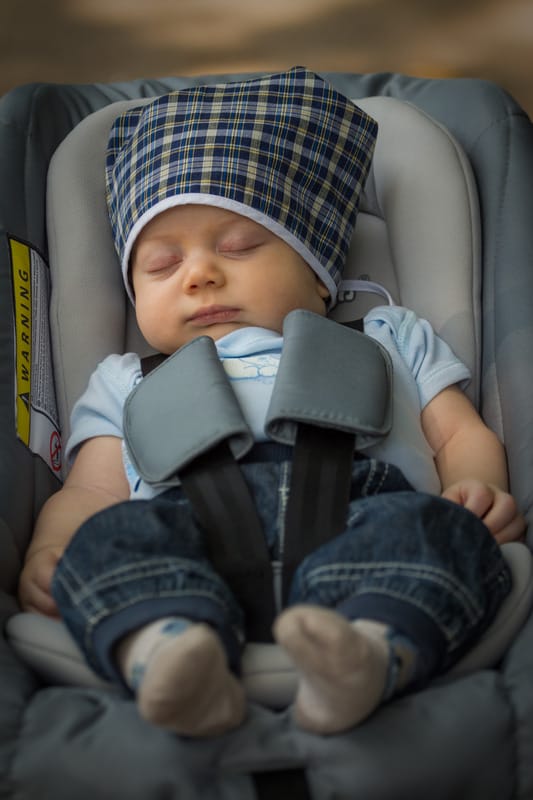
When it comes to feeding our babies, we want to make sure they are getting the best nutrition possible. At around 4-6 months of age, babies are often ready to have cereal added to their diet. It should not be fed to them by a bottle, a spoon is best. However, you should check with your pediatrician if you feel like you should start cereal sooner or if your baby struggles with spoon feedings. Since we are more informed about diets and ingredients, shopping for cereals can be a bit scary. I have compiled a list of the best cereals that my friends and I have fed our children and were pleased with. Knowing exactly what you think will be best for the baby is very helpful before heading down that grocery aisle.
Looking for the Best Walker for Infants? Here Are 5
Walkers have improved quite a bit over the last decade. While some have hung on to the traditional appearance, all of them are styled to be safer and engaging for your baby. They are a fantastic tool to free you up to do what you need and teaches your infant how to be more independent and entertain themselves. Of course, it also helps them become more mobile and strengthen their legs. If you are considering buying a walker for your child, take a moment and look at these reviews before you spend your money.
Owlet Smart Sock 2 Review: Is the Owlet Worth It?
Bringing home your baby from the hospital is a joyous occasion, but it’s also scary, especially for first-time parents. You may be even more scared if your child has health issues. For this reason, many parents turn to baby monitors for help. The Owlet Smart Sock 2 is the most unique type of baby monitor on the market. Created by Kurt Workman, Zack Bomsta, and Jordan Monroe, the Smart Sock is getting rave reviews after just a few years on the market. Is the Owlet worth it? Here’s what you should know.
Car Seat Recommendations: How To Find The Right One For Your Child
Children of the 70s and 80s rode in the front seat of the car with their parents and sometimes in the back of a truck unrestrained. Nowadays, we know it’s safer to make sure our children are properly restrained. From the time a child is born until the child is between eight and ten, parents need to have a car seat.
5 Homemade Baby Food Hacks
I once saw a hilarious depiction of the five types of moms you meet: The PTA mom, Parenting Expert, Crunchy Mom, Hipster Mom, and (my favorite) Hot Mess Mom (see the video below). Despite my best efforts, I identify with the Hot Mess Mom racing to the meeting with stains on her shirt and yesterday’s hairdo going in every direction – which is why you need to know these homemade baby food hacks I’m going to share AREN’T just for the uber-crunchy, hipster, always-put-together moms.
You and me, on our worst days, can pull these DIY hacks off, mama. I guarantee it.
[youtube https://www.youtube.com/watch?v=tOQViEZOwGk]
5 Homemade Baby Food Hacks
When my daughter was born in 2013, we were slightly broke. We let go of my full-time income and benefits after my transition to a part-time position, and our health insurance plan went through the roof.
My husband supported us while I supplemented our income doing childcare, consignment sales, and eventually, launched a career from home as a freelance writer. Throughout that journey, frugal living became a mandate in our home. When I began researching ways to cut costs with an infant, I realized even a “Hot Mess Mom” like me (which, I’m convinced we’re all a hot mess on any given day – which makes us fabulous) could start doing DIY hacks in my home.
Baby food was a huge win. Besides breastfeeding for a full year, making homemade baby food was probably the largest money saver we unearthed (cloth diapers are also a great way to save money – but we rented our home and didn’t want to ruin the landlord’s washing machine…).
Here are five ways you can hack your way into the homemade baby food scene:
1. Don’t rush.
I’m no pediatrician, so please don’t assume this will be the case for you, but when the doctor says to start feeding your child solids when she’s six months old, you may do well to wait. Babies have their own timeline, and as long as they’re receiving full meals via breast milk or formula, they have the nutrients they need before their first birthday. “Food before one is just for fun,” as they say.
You could save tons of money by simply following your baby’s lead instead of forcing her to eat solids too early. When my son spit out every morsel of baby food I offered at six months, I got the hint to chill out. He was in the 98th percentile for height and weight entirely from consuming breast milk and refused solids until he was 11 months old.
The doctor’s only concern after I explained my son’s lack of interest was that he continue learning his motor movements with a spoon or fork. So I gave him plastic ware to tinker with in his high chair during our meals, and he loved it.
Every baby is different, though. When my daughter turned six months old, she watched my plate of food like a shark. I introduced her to solids shortly after that and she devoured them, happily.
Don’t feel the pressure to force your baby to eat solids if he’s not digging it, yet.
2. Start with an easy “superfood.”
Making homemade baby food feels like a huge undertaking at first with cooking, pureeing, freezing, and labeling everything. It can, however, begin more simply.
Try some superfoods that are basically ready to eat, like a banana, avocado, or peach. You don’t have to start with peeling, gutting, and broiling a gigantic butternut squash (although, once you’ve gotten your feet wet, it’s extremely healthy for your baby and not as harrowing as it sounds!).
3. Introduce one new food at a time.
To avoid the risk of allergies, it’s wisest to only introduce your baby to one new food at a time. You may think Tiger needs more variety and that you aren’t being kind by feeding him any other solids except softened carrots, but he’s doing fine.
Babies’ taste buds are developing and each new flavor, no matter how bland, is a vibrant experience to them.
4. You don’t have to use the fancy, expensive equipment.
Sure, companies have produced the perfect gizmos for homemade baby food hacks, but you don’t have to have them. Go ahead and register for a brand new Ninja or Magic Bullet, as well as baby food freezer trays that come with a lid.
If, however, you don’t receive them or don’t have the money to buy them right now, your existing blender, some ice cube trays, tin foil and a Sharpie did the trick for me.
5. DIY when it makes sense.
I started to get pretty good at making all sorts of baby food, but I finally reached my limit when it came to snack pouches. If you browse your grocery store’s baby food aisle, you’ll find a huge selection of pouches that are often organic with two to four healthy ingredients in puree form. The pouch is designed to be mess-free, can be stored anywhere before it’s opened, and exposes children to healthy foods they might not otherwise eat. All for $1 to $2 each. With coupons, I can easily get each pouch for less
The pouch is designed to be mess-free, can be stored anywhere before it’s opened, and exposes children to healthy foods they might not otherwise eat. All for $1 to $2 each. With coupons, I can easily get each pouch for less then $1.50.
The thing is, you can do all of that from home if you want. You can buy reusable pouches that look extremely challenging to clean, as well as those unique ingredients like organic purple carrot or amaranth.
Then, you can cook and puree each one individually and fill your snack pouches with any combination you want.
I need a nap just from typing all of that. For a $1, it’s worth it for me to simply buy the snack pouch (sorry, environment).
Do the DIY thing when it makes sense. Don’t beat yourself up if your friend serves her family home-grown, organic rutabaga, kale and goat cheese for every meal. Start where you can and remember: Fed is best. Simple as that.
What are some homemade baby food hacks you’d like to share? Tell us in the comments below!
Image Credit: thesuccess (MorgueFile)
6 Must-Haves for Working Moms Who Breastfeed
These days, more and more mothers are working outside the home. Toward the end of pregnancy, there is a swarm of decisions that must be made, from what car seat to purchase to what birth plan to use. One of those decisions is whether or not to breastfeed. If you plan on becoming one of the working moms who breastfeed, then here is a list of must-haves to help your transition.
6 Must-Haves for Working Moms who Breastfeed
I worked full-time when my first child was born. After maternity leave, I asked that my hours decrease, but I was still there long enough to require pumping.
Leaving your baby with a sitter and pumping at work is hard. Pumping at work instead of the comfort of your own home isn’t that fantastic at first, either.
After a while, though, I did discover several must-haves I was so grateful to use. Here they are.
A top of the line, dual breast pump
I’m a bit of a cheapskate, but I’m so glad someone talked me into buying a Medela Advanced Breast Pump. My transition into joining the working moms who breastfeed was so much easier than it could have been because of that breast pump.
For more information on quality baby items like the Medela, read here.
A full water bottle
The minute I began pumping, I got thirsty. It would drive me mad not to have water nearby. Keep a quality water bottle freshly stocked at all times – especially when you pump.
A breastfeeding cover
Even if you have total privacy when you pump – and you should – having a breastfeeding cover like this one is a must-have at all times. It’s like have a spare diaper and some wipes on hand. You just never know where you’ll end up when you need them.
Besides, if you’re tense when you pump, you produce less milk and the process takes longer. That can be incredibly frustrating. Invest in something that will help you feel at ease.
Something to do
Pumping at work takes time, and you just sit there. Even though your hands are somewhat tied up, be sure to bring something along to entertain yourself. You could listen to music, an audio book, or a podcast. Or you could read (it can be done).
Or you could count ceiling tiles when you forget to bring something. ::sigh:: I’ve been there.
Storage bags
Breast milk storage bags were also crucial to my success as one of the working moms who breastfeed. They’re designed to hold enough for a single serving and hold up well in a freezer. You’re able to write the date on each one which makes sure your baby gets milk before it expires.
These storage bags were my favorite because they could be attached directly to my Medela breast pump – with the correct accessory. That saved SO much time with a lot less clean up.
A firm understanding of your rights
The biggest thing I’d want working moms who breastfeed to understand is their rights in the working place. They are legally permitted to take breaks to pump as often as necessary. Employers are required to provide a private room, other than a bathroom, during these break times.
Obviously, harassment from co-workers or their unwillingness to comply with regulations is illegal.
Breastfeeding is a wonderful gift you can give your baby. Know your rights. Click here for more information.
Would you add any must-haves for working moms who breastfeed to this list?
Image Credit: William Iven (UnSplash)
This post contains affiliate links.
5 Quality Baby Items That Are Worth the Investment
In 2014, my husband and I had two in two years. We also lived on less than $2,000 per month. Having a lot of baby things simply wasn’t an option during that season of life. However, we did save up for a number of quality baby items, and I’m glad we did.
We may not have had new living room furniture or all new kitchen appliances, but if there was something costly that got its money’s worth for our kids, then it was money well spent.
5 Quality Baby Items Worth the Investment
Hear me out. One thing we did not do is go into debt to purchase these items. Nor did we dip into our emergency fund. Either option would have been so much easier. Instead, we opened a checking account with no minimum balance required and labeled it our “Baby” account.
Each month, we’d budget an allotted amount into the account. Having it separate from our primary checking helped protect that money from being mishandled.
We saved up, used coupons, used gift cards, or we said no to the purchase.
There are so many different brands of these products, but here are the ones we chose and that I recommend.
1. Fisher-Price Rock ‘n Play Sleeper
We kept our babies in this Rock N’ Play throughout their entire newborn stage. It was so nice to have them right next to our bed at night, elevated so they could probably breathe when congested. Another perk was how lightweight the product was. After I had an unexpected c-section with my second child, I had a major weight restriction during the first several weeks. The Rock N’ Play was easy to fold and transfer from room to room.
2. Medela Advanced Breast Pump
I made the choice before my first child was born to breastfeed. I was still employed at my banking job during that time, so have a reliable and efficient breast pump was crucial. Since that time, the government has made it much easier to obtain breast pumps for free or to receive reimbursement on a purchase. Definitely look into that. If you can’t get one (a QUALITY one) for free, then I highly recommend this product. It hasn’t given me any problems and I was able to breastfeed both of my children for at least 12 months.
3. Aden + Anaias Swaddle Blankets
The features I love most about these swaddling blankets is that they’re sheer which reduces the risk of suffocation, and they’re large enough to do a full swaddle on a baby throughout the first six months to a year. My 2-year-old son still chooses his Aden and Anaias blankets to sleep with over any other bedding.
4. Braun Ear Thermometer
If you’re up at 2:30 AM with a screaming, feverish baby, you need a reliable thermometer that will tell you exactly what’s going on, every time. I tried the cheap route at first, using a knock-off thermometer under the baby’s armpit (try getting a fussy baby to keep his arm down long enough to get a consistent reading). Finally, I realized it wasn’t worth the risk of misdiagnosing. High fevers can spike at any time. I’ve caught each of them in time with my Braun ear thermometer.
5. Wooden Toys
What I love about wooden toys is that they’re made well. My parents grew up in the era of wooden or metal toys. I was raised throughout the dawn of plastic. To see the difference in toys like Melissa & Doug and many others is very refreshing. I head straight to that aisle every time I buy a gift for a baby shower or child’s birthday party.
What quality baby items are you grateful you purchased? Share in the comments below!
This post contains affiliate links.
Image Credit: Gaelle Marcel (UnSplash)
5 Ways to Save Money on Diapers Using Amazon
Every parent knows having a child drastically changes your finances. One of the largest expenses to enter the picture is diapers. It’s a fixed expense for the first three years of a child’s life, right? So, how can we save money on diapers?
The list is long. I wrote a post about this earlier called “How to Save Money on Diapers.” That would be a good place to head once you’re done here.
Since there was more to say after writing that first article, I decided to write a follow-up post specifically talking about Amazon.
5 Ways to Save Money on Diapers Using Amazon
I’m not saying you should only shop at Amazon for your diapers. I actually buy mostly off brand diapers in bulk at places like Target or Costco. That’s just how I do my shopping.
If you’re a pretty active online shopper looking to save money on diapers, then give these tips a try.
1. Subscribe & Save
No Prime membership required. All you do is sign up for Amazon’s Subscribe & Save program and choose from their selection of products. If there is something you need regularly, like paper towels or diapers, then subscribe. They’ll show up on your doorstep on the selected date saving you up to 15% off each time.
2. CamelCamelCamel.com
Want to know when diapers are at their lowest market price? Head over to CamelCamelCamel.com to find out. Enter the name of the product and look at its track record of the last year. That’ll help you determine when it’s best to shop next.
3. Price Tracker App
Do you prefer shopping on your mobile device? Save money on diapers by using the Price Tracker App. If you have Amazon’s store app already on your phone, then you have the Price Check feature within that app. That is a second method you could use to save money on your phone.
4. SnagShout.com
Find deep discounts on Amazon products on SnagShout.com. I first described SnagShout as a great resource when you’re searching for frugal Christmas gifts (read the full article here). But SnagShout can also be great for everyday items that aren’t quite as exciting but cost just as much green stuff in your wallet.
A.K.A. diapers.
Up until October 2016, SnagShout users were required to leave a review on Amazon in exchange for receiving the deep discounts on products. However, the policy was revised to reflect Amazon’s choice to make it illegal to require anyone to leave a review.
So, now you simply need to check out SnagShout’s merchandise, find the kids & baby section and see if there are any cloth diapers or nursing covers or other gems up for grabs.
5. Register for an Amazon baby registry.
If you’re having a baby shower, then consider registering on Amazon. Some perks include: free 90-day returns, millions of products from which to choose, 15% off Completion Discount on eligible items for Prime members.
Plus, people have the option of giving Amazon gift cards. Combine those with the 15% off through Subscribe & Save and you’ll get a bunch of diapers for not a bunch of money.
Have you ever tried to save money on diapers online? What’s one thing that worked for you?
Image Credit: Janko Ferlic (UnSplash)
How to Save Money On Diapers
After having two children under two years, I “get” diapers. We lived on a tight, single-income budget, so I’ve also done my share of deal hunting. It turns out, you can save money on diapers every time, if you know where to look.
Whether you’re raising a family, pregnant with your first child, or shopping for a baby shower, deals are constantly out there. They come in all shapes in sizes. I want you to leave this article with enough information to never pay full price for diapers again.
5 Ways to Save Money on Diapers
Crunch some numbers.
The best way to figure out how to save money on diapers is to start calculating the price per diaper every time you shop. Diapers come in so many different sizes, quantities, specialties, and brands, that it can be confusing to find the least expensive option.
You can calculate the price per diaper manually or by reading the store label for a “price per unit.”
This step is the foundation in educating yourself about how much money you’re actually saving.
BONUS TIP: Try writing the price per diaper on a piece of masking tape and placing it on your diaper box when you bring it home. That way, you can compare each purchase to see where you find the best deals.
Buy the largest quantity available.
When you calculate the price per diaper in any super market, you’ll usually spend more on fewer diapers. Do your best to buy the largest quantity available.
The only exception to this rule is if you have a coupon for a fixed amount like “$1.00 Off Any Pampers Diapers 52 Ct. Or More.” If you buy a smaller box of diapers, then that $1.00 will impact the price per diapers greater and may save you the most money.
Stores like Costco or Sam’s Club are great for buying larger quantities of diapers. Costco also has a terrific return policy. Pretty much anything you buy from them you can return in 90 days with few questions asked.
Recommended Reading: “Why a Costco Membership is Beneficial for Our Family”
Collect coupons or codes.
If you tear open a box of name brand diapers, like Pampers or Huggies, you’ll notice a rewards code on one of the diaper packs. If you enter those into the rewards site, you can eventually earn a discount on your next purchase. Coupons, whether in-store or via manufacturers, also add value to your savings.
Buy new diapers secondhand.
A new diaper is a new diaper. Even if you buy from a yard sale, a consignment sale, or on a Facebook garage sale, it’s still (HOPEFULLY) unused. The only time I’d ever consider buying a used diaper is if it’s cloth. They’re washable, reusable, much less expensive in the long run, and much friendlier to earth.
Stock up during a great deal.
One of my favorite ways to save money on diapers is at Target. Their Up & Up brand of diapers is consistently less expensive than the name brand competitors. Also, they routinely offer a $5, $10, and sometimes $20 gift card back to you for purchasing two large boxes. If you know your little one’s size and can afford stocking up on multiple purchases, you could earn some serious Target cash right at the register.
BONUS TIP: Don’t forget to use store apps to get the latest deals. Target’s Cartwheel is a great example.
How do you save money on diapers? Tell us in the comments below!
Image Credit: Juan Galafa (UnSplash)
Things to Consider When Buying a Car Seat
Car seats are a necessity with children. Though some parents scoff at the added expense, there really is no price to put on the safety of our children’s lives. We’d feel awfully bad if we were in an accident and our child was hurt due to a preventable scenario in buying a properly fitted car seat. In saying all this, it can be overwhelming when it comes to actually choosing a car seat for your child.
It’s been a few years since we’re had to shop around for a car seat but now that we’re in the process of buying a second vehicle we’re faced with the added expense of another car seat as well (because any parent knows how fun it can be to play musical car seats between multiple vehicles!). There are a lot of great resources out there on child car seat safety, helping to direct you in terms of exactly what specifications you need for your child, but I will also offer a few things to consider from a mom perspective.
Consider Price, But Don’t Let It Dictate Your Purchase
If you’ve ever shopped around for a car seat you’ll know that they can range anywhere from $100 to $1000, easily. The price alone can be overwhelming and you can’t help but assume the more you spend, the safer your child will be but that’s not true. While the $1000 car seat will likely have some nice options it doesn’t mean your child will be ‘’more safe’’ and that is the main point when it comes to car seats isn’t it? Find a few within your price range and do your research. Which brings me to my next point…
Do Your Research!
Like any important purchase, research will be necessary before buying anything. There are many resources out there to help you read up on the safety and/or known issues with the car seats you have selected. Also don’t forget to research car seats that fit will in your current vehicle. We researched car seats forever and finally settled on one only to receive it and find out it didn’t fit in our vehicle at all. The base was way too large so we had to return it and start our search over. Had we started with searching forums about seats that fit well in our vehicle it would have greatly narrowed our search down and saved us a ton of time.
Pay Attention to Expiration Dates
Car seats actually expire. There are a number of reasons manufactures choose to do this (and it really isn’t just a money grab), things like plastic breaking down and safety labels falling off are a few. When we bought out first infant car seat we got a great sale for a car seat/stroller combo only to find out the car seat would actually expire before we were done using it. Thankfully the store had another (with a longer expiration date) in store and exchanged it for us allowing us to use it for the almost full 18 months we intended.
Invest In a Seat Saver
At most major retailers (think Walmart or Babies ‘R Us), you can find car seat savers. They are essentially a pad you put in your car and can sit your car seat on. We didn’t buy one and regretted it. The car seat can make your vehicle kind of…gross. While nothing much happens during the newborn infant stage, the car seat (or base depending on model) can seriously indent the seat of your vehicle. Once kids are old enough to have snacks and drinks in the car it becomes a whole new world. You will find things under the car seat you didn’t know existed (food, water stains, toys…) having one of these seat savers will help you preserve your car. Bonus, they’re pretty cheap, I see them in sale for less than $20 quite often.
A car seat is an important purchase for your family and there is a lot to consider when buying one.
What was the biggest influence on you when deciding on what to buy?
Catherine is a first time momma to a rambunctious toddler. When she isn’t soaking up all that motherhood has to offer, you can find her blogging over at Plunged in Debt where she chronicles her and her husbands journey out of debt. You can also follow her on Twitter.